# Setup
The Intercom React Native wrapper allows you to use [Intercom for iOS](https://github.com/intercom/intercom-ios) and/or [Intercom for Android](https://github.com/intercom/intercom-android) in your React Native apps.
If you’re new to Intercom, you’ll need to [create an account and start your free trial](https://www.intercom.com).
> 📘 Supported versions
The Intercom React Native wrapper supports version **0.59** of React Native and above.
Intercom for iOS supports **iOS 13** and above.
Intercom for Android supports **API 21** and above.
## Step 1 - Adding the wrapper
To install Intercom you'll need to add the wrapper to your React Native project using the following snippet:
```text
yarn add @intercom/intercom-react-native
```
```text
npm install @intercom/intercom-react-native
```
There are separate steps for setting up Android and iOS. If your React Native app does not support Android skip to [Step 3](https://developers.intercom.com/installing-intercom/docs/react-native-installation#section-step-3-ios-setup).
## Step 2 - Android Setup
You'll need to take steps to link the wrapper in your project. These vary based on your apps React Native version.
### Using React Native v0.60 and above
If you're using React Native v0.60 or above, the library will be linked automatically
### Automatic linking with React Native v0.59
To automatically link the Intercom React Native wrapper in v0.59 of React Native run the following command:
```text
react-native link @intercom/intercom-react-native
```
### Manual linking with React Native v0.59
If you prefer to manually link libraries, add the following snippet to `android/settings.gradle`:
```groovy
include ':intercom-react-native'
project(':intercom-react-native').projectDir = new File(rootProject.projectDir, '../node_modules/@intercom/intercom-react-native/android')
```
Inside the dependancies block of `android/app/build.gradle` add the following line:
```groovy
dependencies {
implementation project(':intercom-react-native')
}
```
> 🚧 Apps using a React Native version below 0.65
React Native versions below 0.65 use OkHttp 3. The Intercom SDK currently uses OkHttp 4.
There is a problem with compatibility between those two versions which may result in crashes.
You can fix this by adding an explicit dependency on `okhttp-urlconnection` to dependencies in `app/build.gradle`:
```
dependencies {
implementation("com.squareup.okhttp3:okhttp-urlconnection:4.9.1")
[...]
}
```
## Initialize Intercom
> 🚧 Minimum Android SDK and build tools versions
The `minSdkVersion` in `build.gradle` needs to be to `21` or greater
In the dependencies block of the `build.gradle` make sure that
`com.android.tools.build:gradle` is at version `4.0.1`
You'll need to update the `MainApplication.java` class. First add the import `com.intercom.reactnative.IntercomModule` at the top of the class.
Then in the `onCreate` method, add the snippet below using the `apiKey` and `appId` found in your [workspace settings](https://app.intercom.com/a/apps/_/settings/android).
```java
import com.intercom.reactnative.IntercomModule; // <-- Add this line
// ...
@Override
public void onCreate() {
super.onCreate();
SoLoader.init(this, /* native exopackage */ false);
// ...
IntercomModule.initialize(this, "apiKey", "appId"); // <-- Add this line
// ...
}
```
#### Android Permissions
Add below permissions to `AndroidManifest.xml`
**Image Attachments**: No additional permissions are required for image attachments on modern Android versions (Android 10+). The SDK uses the system photo picker and scoped storage APIs that don't require storage permissions.
You can also include [VIBRATE](http://developer.android.com/reference/android/Manifest.permission.html#VIBRATE) to enable vibration in push notifications:
```xml
```
## Step 3 - iOS Setup
If you don't support iOS in your React Native app, you can skip to the [configuration step](https://developers.intercom.com/installing-intercom/docs/react-native-configuration).
### Using React Native v0.60 and above
If you're using React Native v0.60 or above, the library will be linked automatically after running the `pod install` command.
### Manual linking with React Native v0.59
Firstly open your apps `.xcworkspace`. If you don't have a `.workspace` file open the `.xcodeproj`.
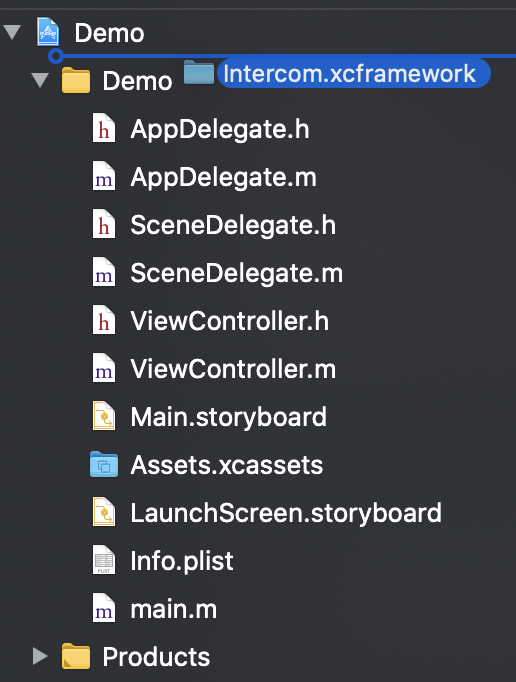
[Download intercom for iOS and extract the zip](https://github.com/intercom/intercom-ios/archive/master.zip)
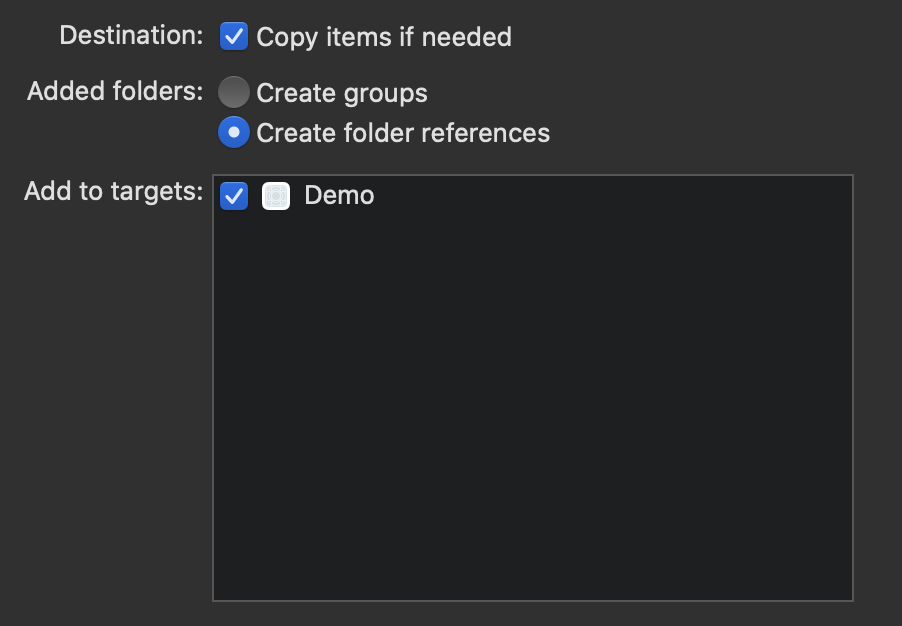
Drag Intercom.xcframework into your project. Make sure **"Copy items if needed"** is selected and click Finish.
For additional information on iOS manual linking please refer to the [React Native developer docs](https://reactnative.dev/docs/linking-libraries-ios).
## Initialize Intercom
For Objective-C, open `iOS/AppDelegate.m` and import ``.
For Swift, open `iOS/AppDelegate.swift` and import `intercom_react_native`.
```objectivec
#import "AppDelegate.h"
#import
#import
#import
// ...
#import // <-- Add This
```
```swift
import intercom_react_native
```
Next, in the method `didFinishLaunchingWithOptions` you'll need to initialize Intercom. Add the snippet below using the `apiKey` and `appId` found in your [workspace settings](https://app.intercom.com/a/apps/_/settings/ios).
```objectivec
// ...
self.window.rootViewController = rootViewController;
[IntercomModule initialize:@"apiKey" withAppId:@"appId"]; // <-- Add this (Remember to replace strings with your api keys)
return YES;
}
```
```swift
func application(_ application: UIApplication, didFinishLaunchingWithOptions launchOptions: [UIApplication.LaunchOptionsKey: Any]?) -> Bool {
....
Intercom.setApiKey("", forAppId: "")
....
}
```
#### IOS Permissions
With the exception of apps that only support iOS 14+, when installing Intercom, you'll need to make sure that you have an NSPhotoLibraryUsageDescription entry in your Info.plist.
```xml
NSPhotoLibraryUsageDescription
Send photos to support center
```
For apps that support iOS 13 or lower, this is required by Apple to access the photo library. It is necessary when installing Intercom due to the image upload functionality. Users will be prompted for the photo library permission only when they tap the image upload button.
On iOS 14+, Intercom uses the new PHPickerViewController API which does not require requesting users for photo library permission.
## What next?
1. Once you've got Intercom installed it's time to use it on your [React Native app](https://developers.intercom.com/installing-intercom/docs/using-intercom-react-native).
2. [Enable push notifications](https://developers.intercom.com/installing-intercom/docs/react-native-push-notifications) so you can send push messages.
3. [Enable Identity Verification](https://developers.intercom.com/installing-intercom/docs/react-native-identity-verification) for your React Native app.