This guide explains how to set up a Custom Channel in Intercom. It is intended for teams embedding Fin into their own applications via our Custom Channel API.
Please reach out to your accounts team to discuss access and tailored, hands-on support.
To complete setup, you will need:
Access to the Custom Channel API feature (currently under managed availability).
An application with:
- A server that can handle incoming HTTP POST requests from Intercom (this is also the Callback URL you will configure);
- A UX that reacts to and integrates with Intercom events
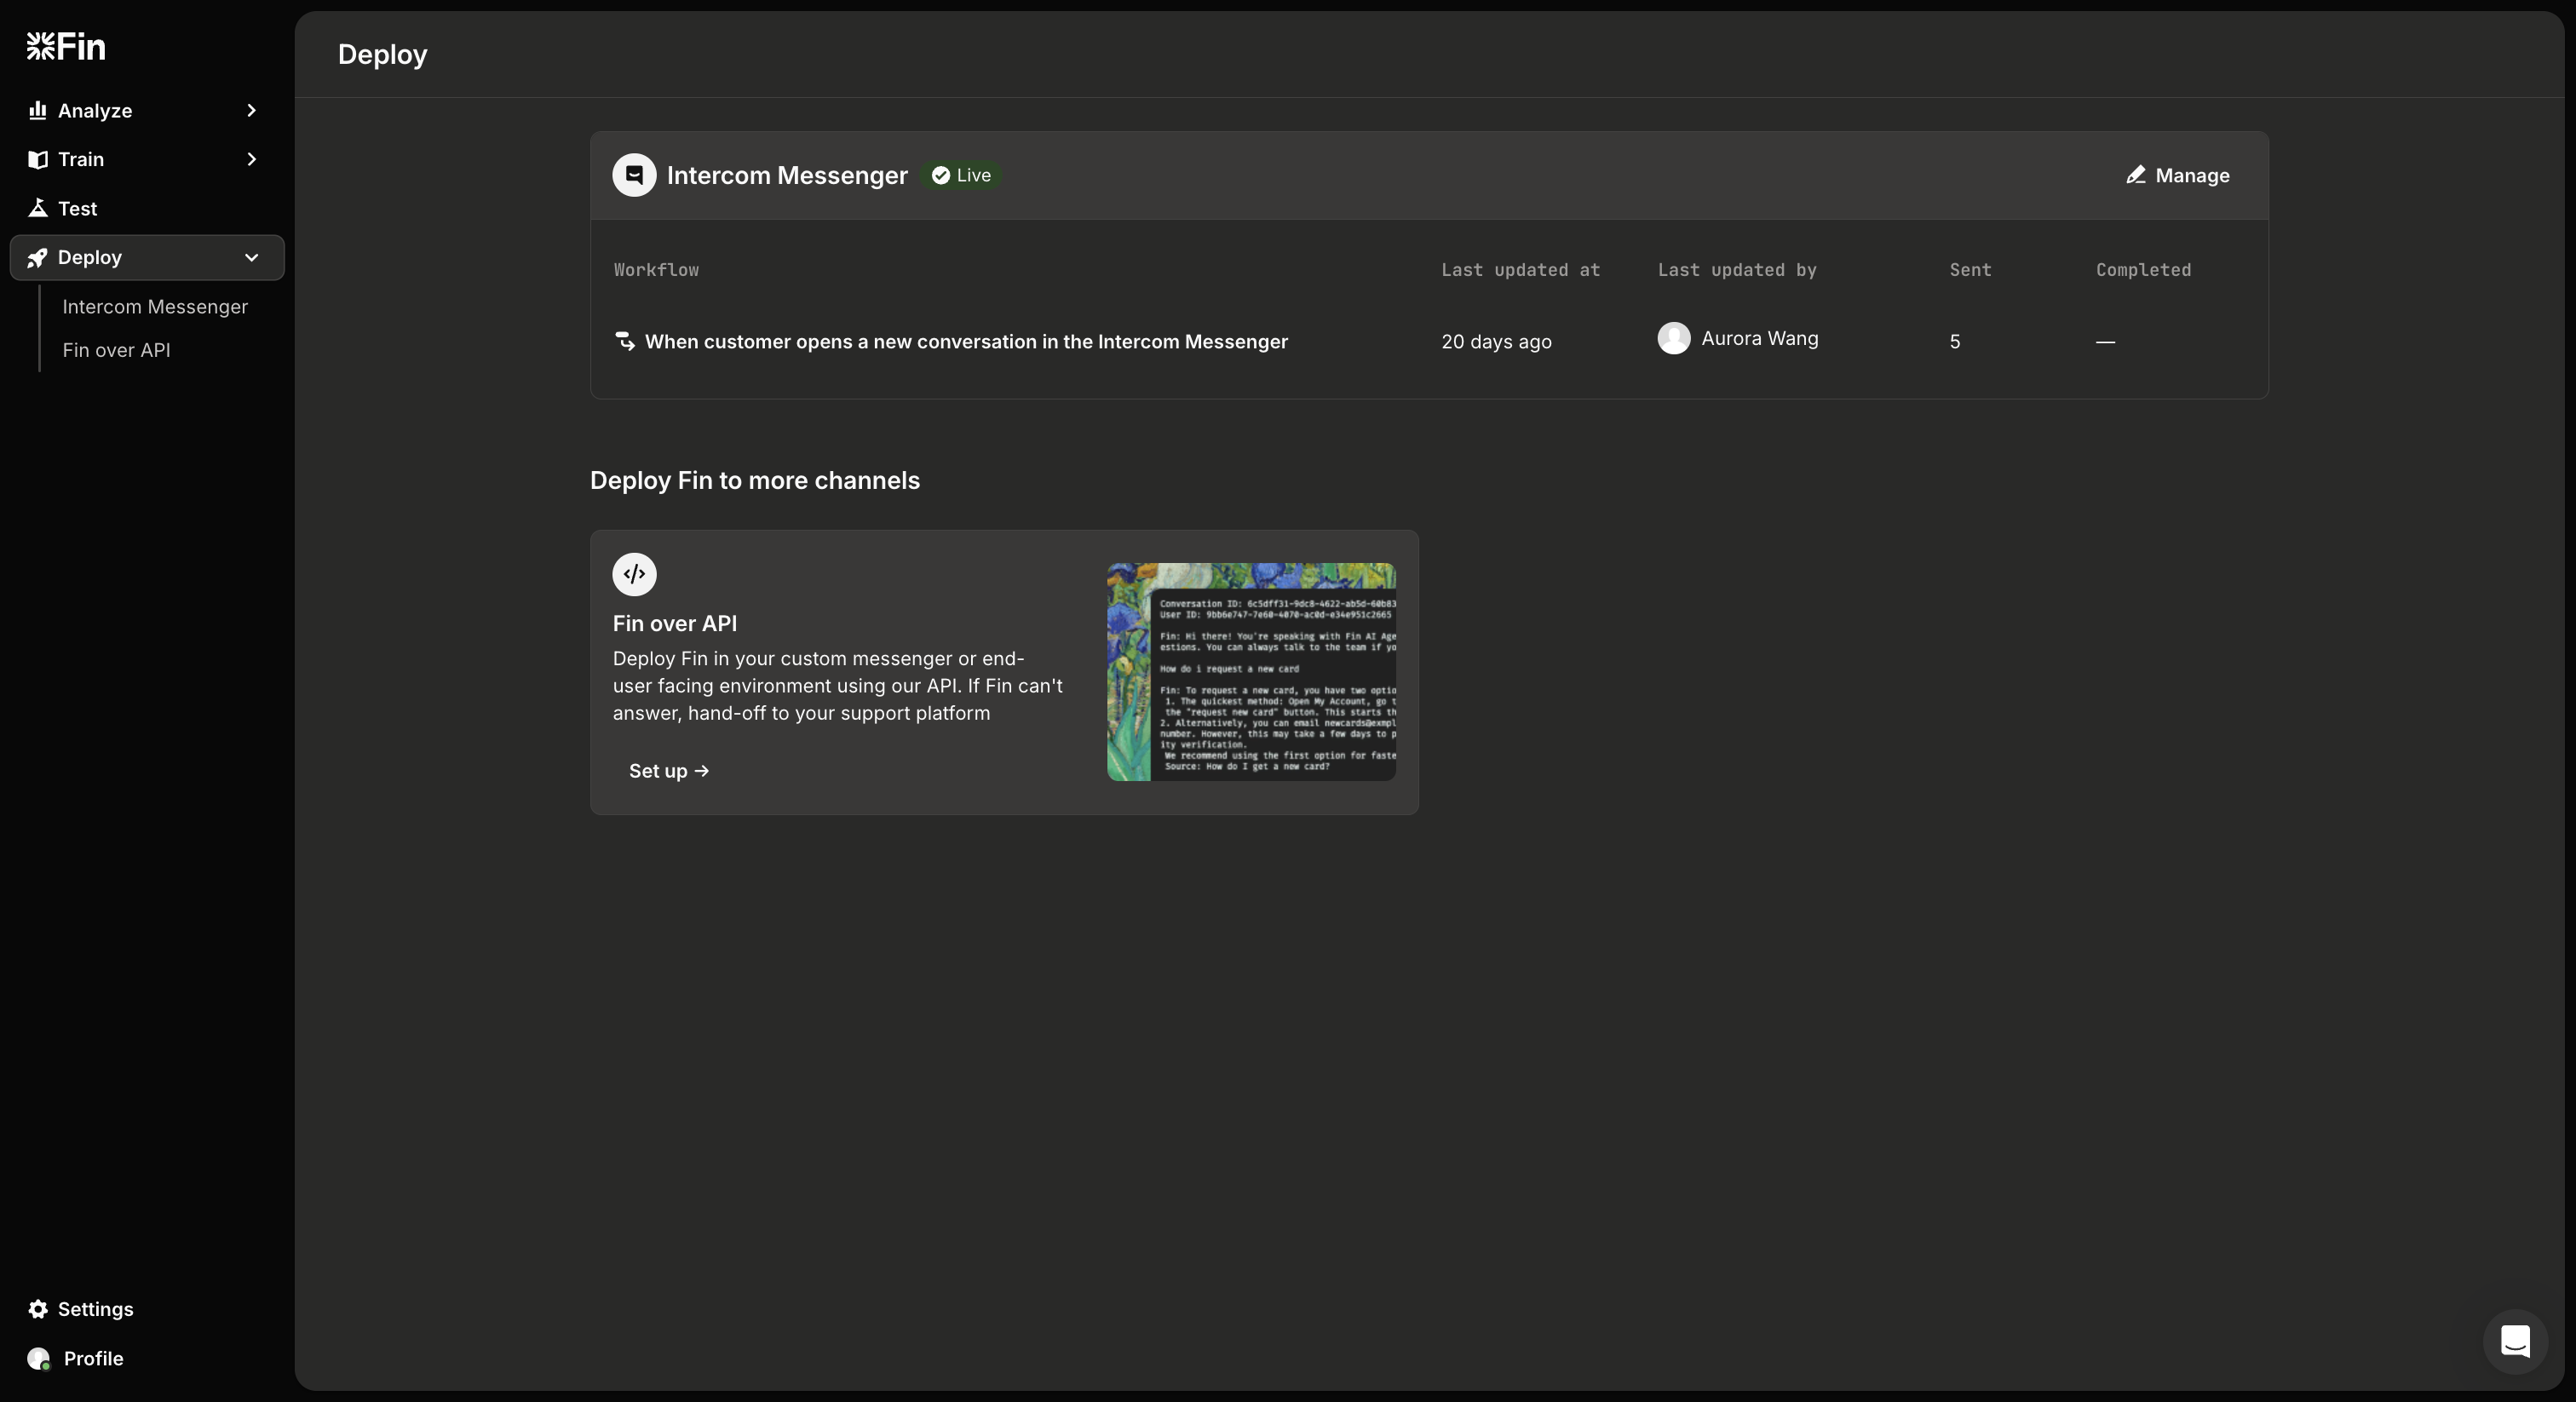
From your Intercom workspace:
- Go to Deploy > Fin over API in the side navigation.
- In the Integration section, click Setup Custom Channel Integration to expand the configuration form.
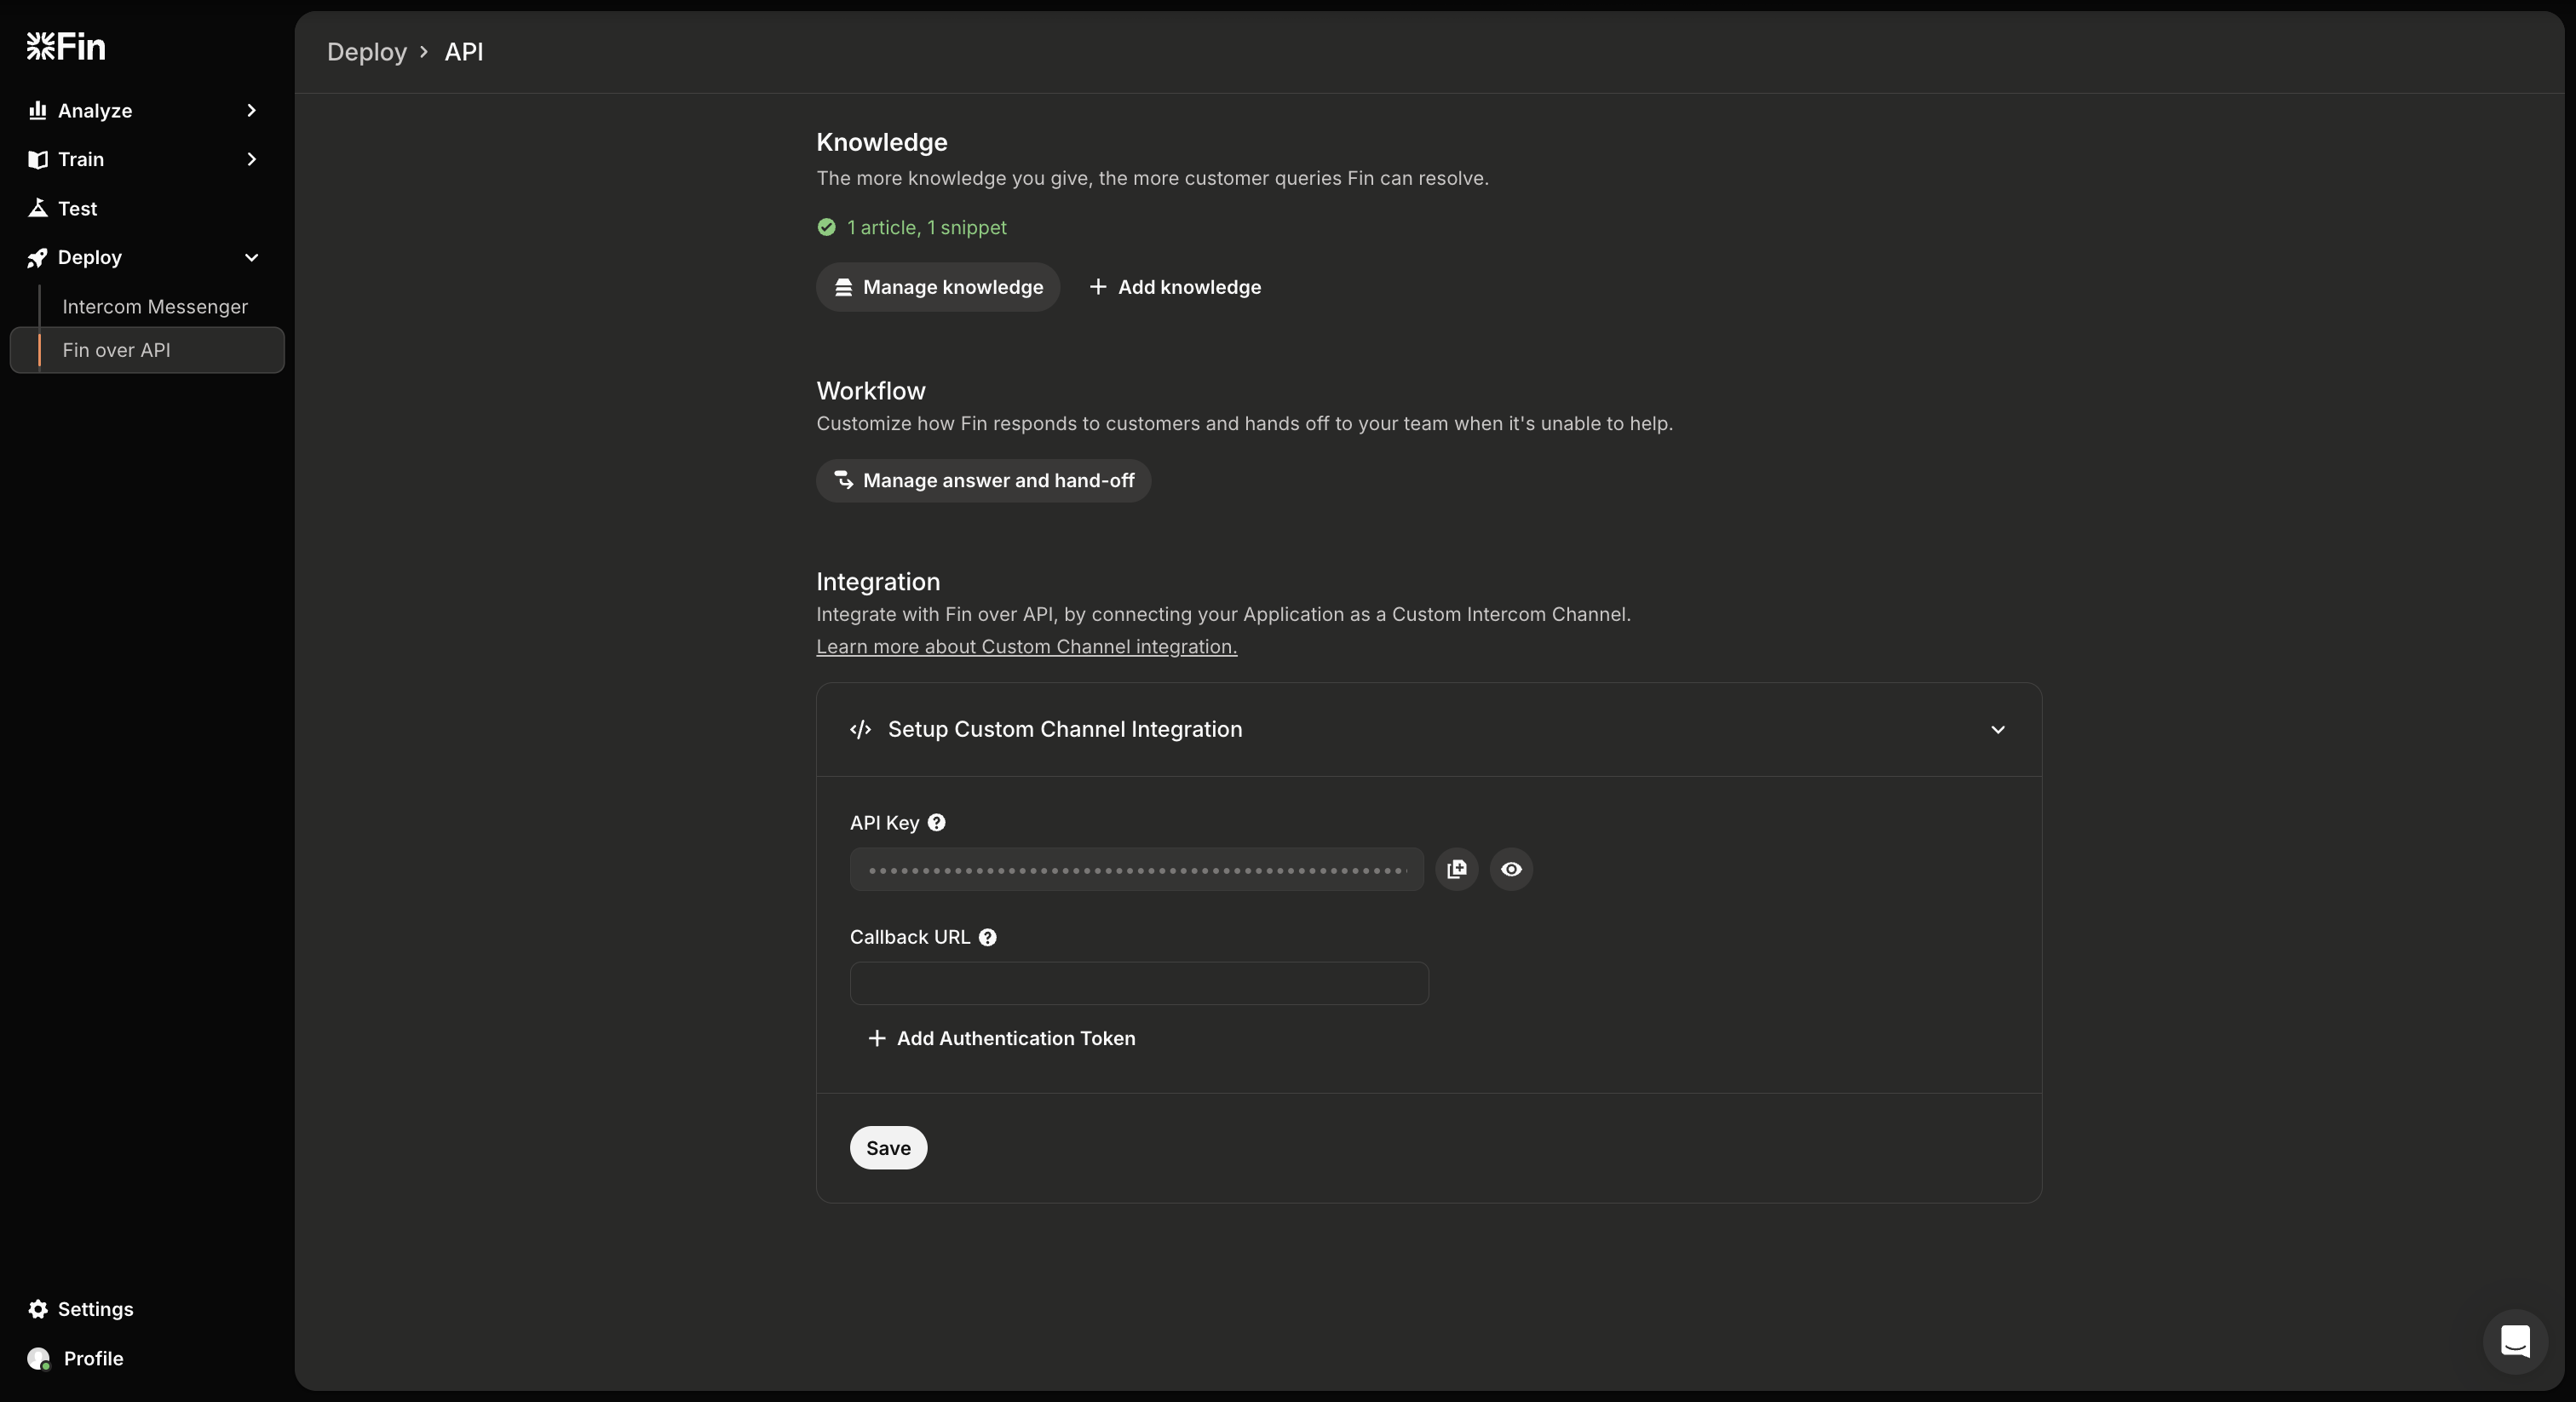
In the setup form:
- API Key: This key is pre-generated and shown (obscured) in the setup page. You should use the key when calling Intercom's Custom Channel Events API.
- Callback URL: Enter the HTTPS URL of your backend server that can receive POST events from Intercom.
- (Optional) Add Authentication Token: If your endpoint requires additional authentication (which we strongly recommend), you may define a token here. Intercom will include it as a header when sending outbound events.
Click Save to persist your integration settings.
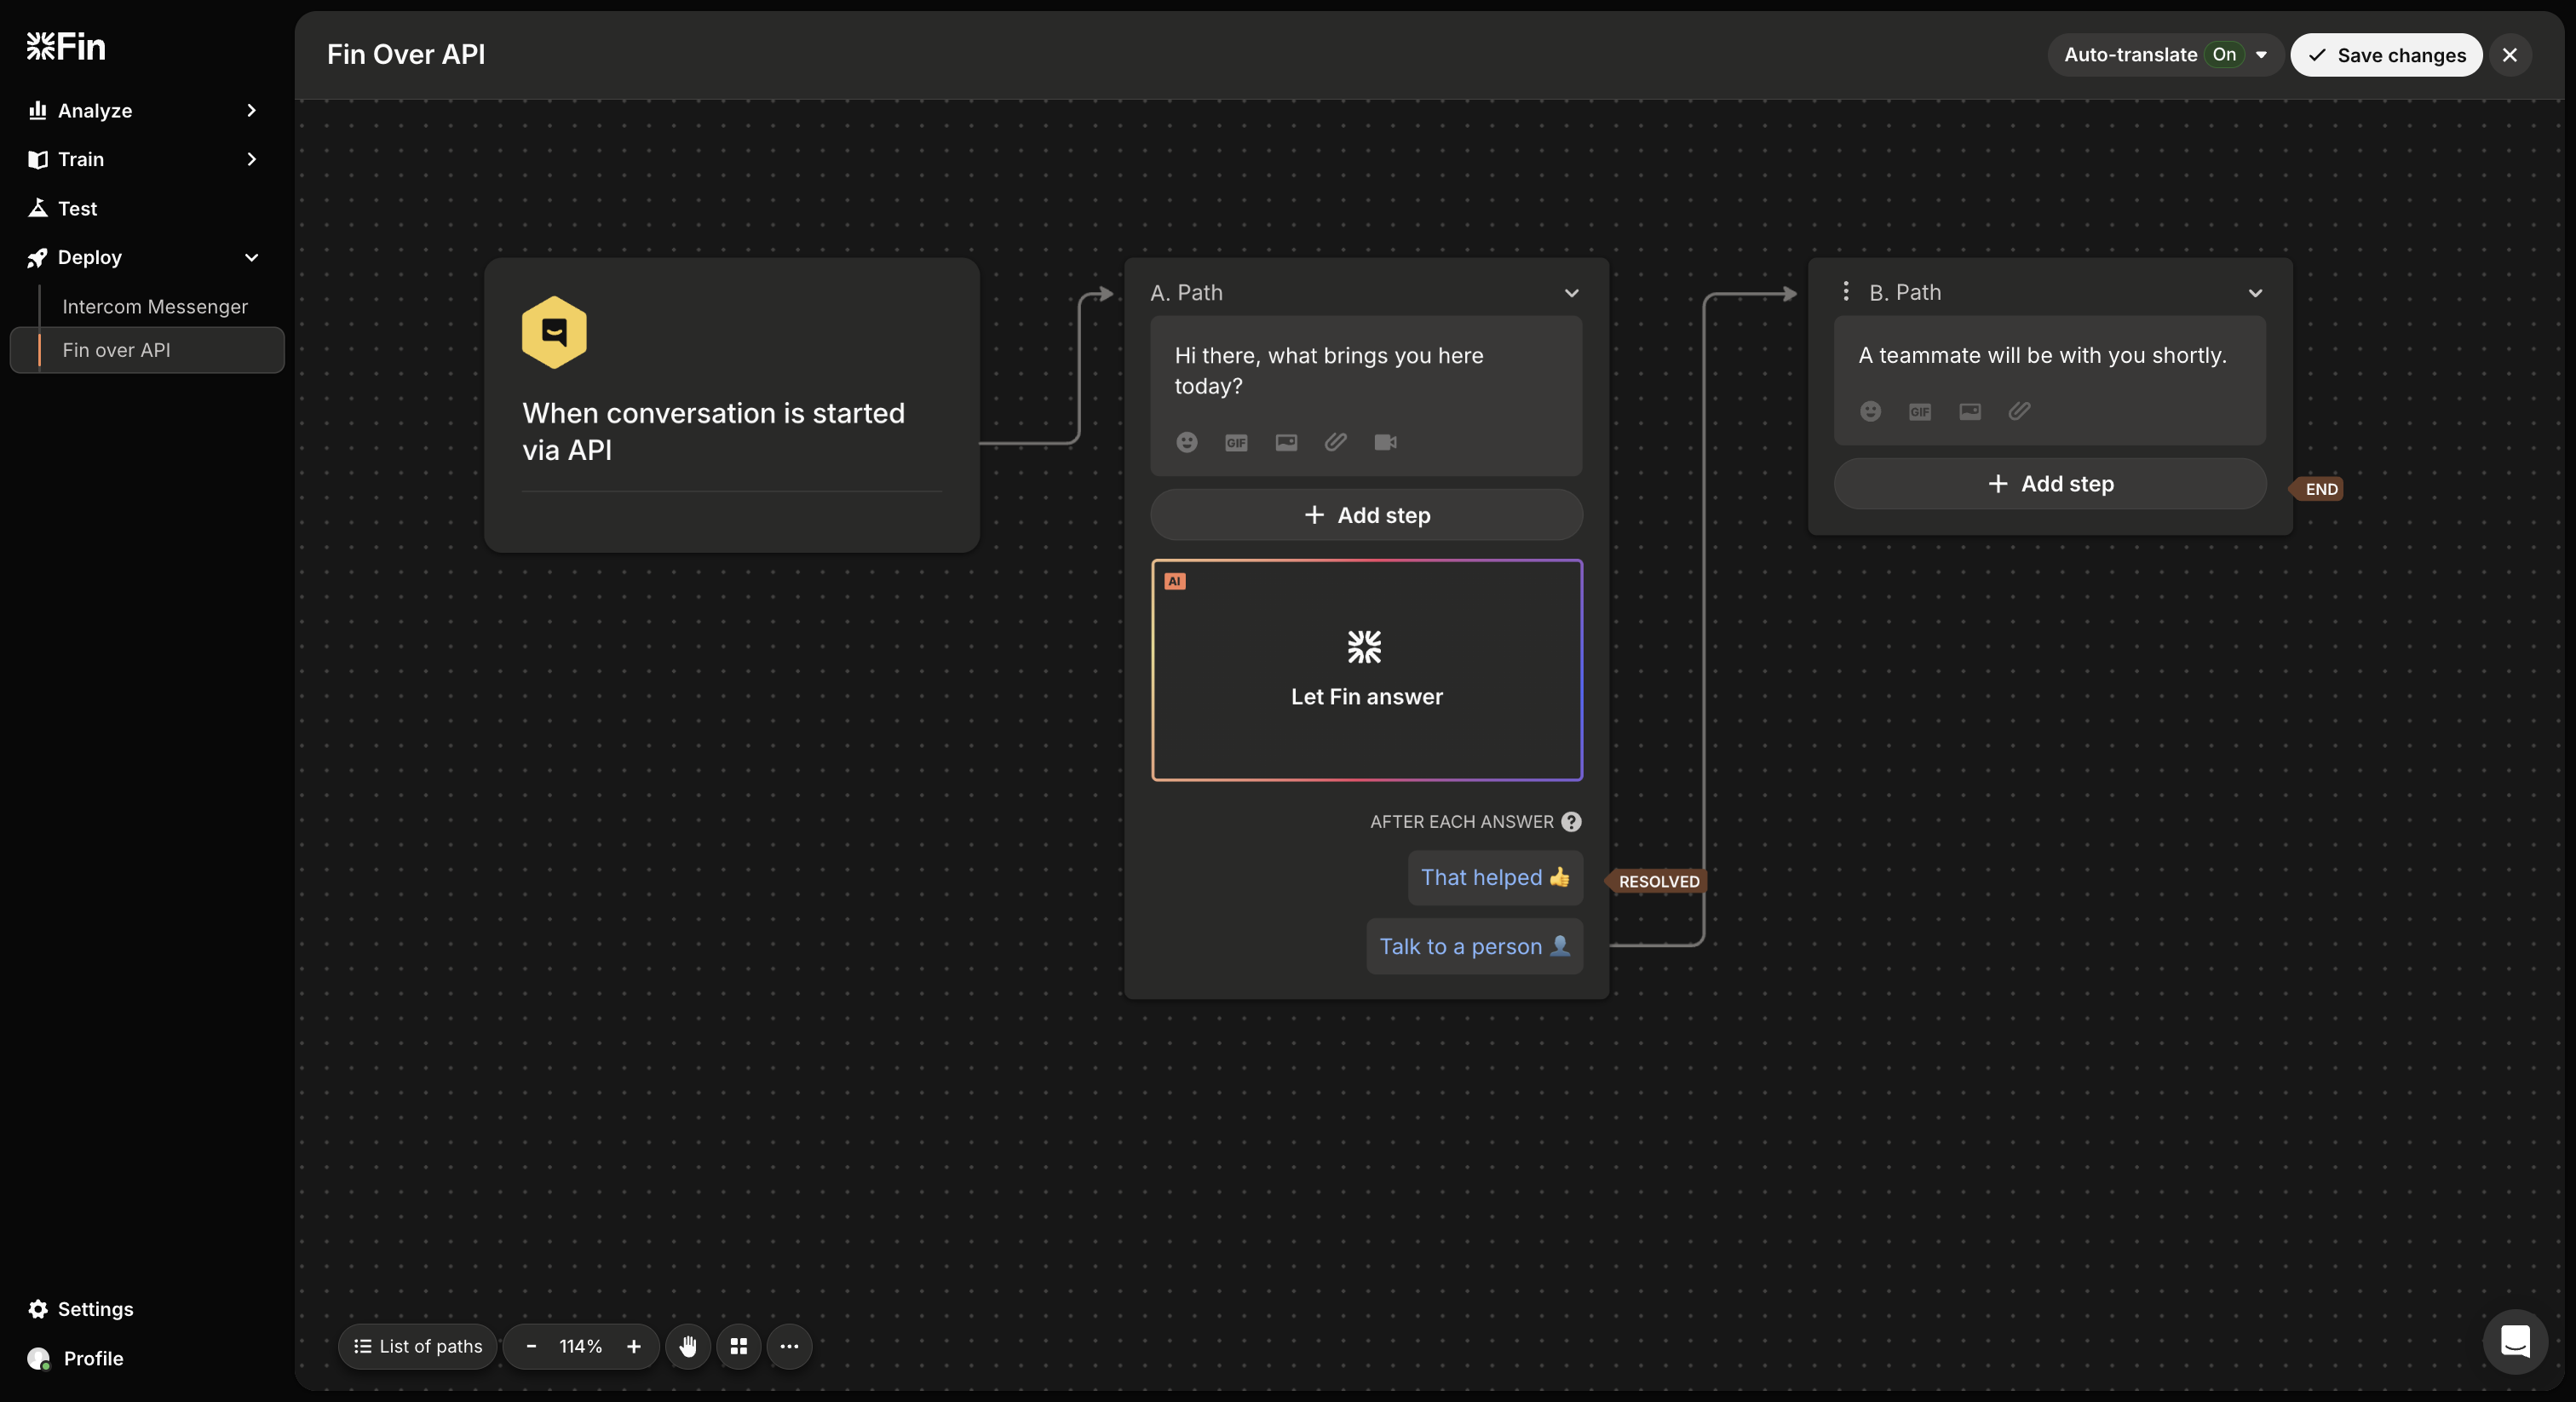
Once your API integration is configured, the next step is to build or edit a workflow in Intercom that uses the Let Fin answer step.
- Go to Deploy > Fin over API > Manage answer and hand-off in Intercom.
- Add the Let Fin answer step where appropriate. This enables Fin to respond to the user based on your knowledge base.
- Configure fallback steps for when Fin cannot resolve the question.
- Optionally, include other steps like Data collector, Tag, or Note to guide the experience.
When your app triggers the workflow using a new_conversation event, Intercom will execute the configured flow and Fin will respond accordingly.
Make sure to publish the workflow when you're done.
Your callback endpoint should be able to receive POST requests from Intercom. The payload will include various event types like new_message, typing, quick_reply_options, etc.
Example base structure:
{
  "event_type": "new_message",
  "conversation_id": "intercom_abc123",
  "external_conversation_id": "external_abc123",
  ... // additional event-specific data
}
Refer to the Custom Channel Integration guide for a complete list of supported events and payloads.
Your application can begin a conversation with Fin by sending inbound events to Intercom (via the Custom Channel Events API).
Typical event sequence:
new_conversation— start a new workflownew_message— send a user messagequick_reply_selected— user selects a predefined button
Ensure you link your messages to the correct conversation using the external_conversation_id.
Use your app’s interface to:
- Initiate a Fin workflow via
new_conversation - Observe outbound responses (e.g.,
new_message,quick_reply_options,typing) - Simulate user replies and trigger appropriate inbound events
You can monitor and troubleshoot interactions using your server logs and Intercom's workflow analytics.
Although Fin handles the conversation logic, your app has full control over the UI/UX:
- Render Fin responses with your own UI components
- Show loading states using
typingevents - Display button options from
quick_reply_options - Handoff to human support based on
resolution_state_updatedorworkflow_finished
This model gives you complete flexibility while keeping the intelligence and automation of Intercom Fin.