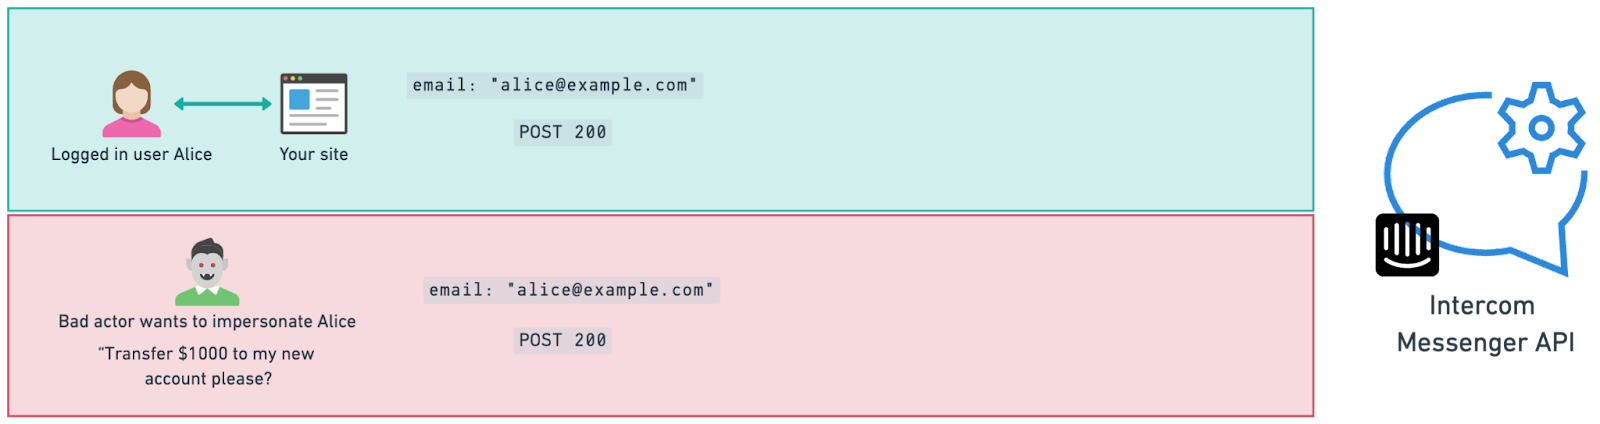
JWTs (JSON Web Tokens) are the recommended method to secure your Messenger. With JWTs, you can ensure that bad actors can't impersonate your users, see their conversation history, or make unauthorized updates to data.
Messenger security works by requiring a unique server side generated JSON web token (JWT), based on the user’s user_id, a payload of data about the user (optional) and the Messenger API secret key from your Messenger security settings.
We strongly recommend this for every Messenger installation for users. Without it, a bad actor could gain unauthorised access to the data in your workspace through impersonation of your real users. See more in our help doc
Already using Identity Verification? Check out our migration guide to switch from HMAC to JWT.
You can set up, turn on or turn off Messenger Security at any time in the Intercom for web settings. Here you will isntructions and code examples for many languages and frameworks.
Note: Turning off the feature can be useful while you’re developing but your workspace's data will be vulnerable to unauthorised access or cross-user impersonation while it’s off.
Token Expiration: Set token expiration times that match your app's session length. While shorter-lived tokens provide better security, the expiration should align with your authentication flow.
Token Refresh: If you set an expiry, periodically provide fresh tokens to the Intercom SDK, especially when updating user information. This ensures the most current user data is securely verified.
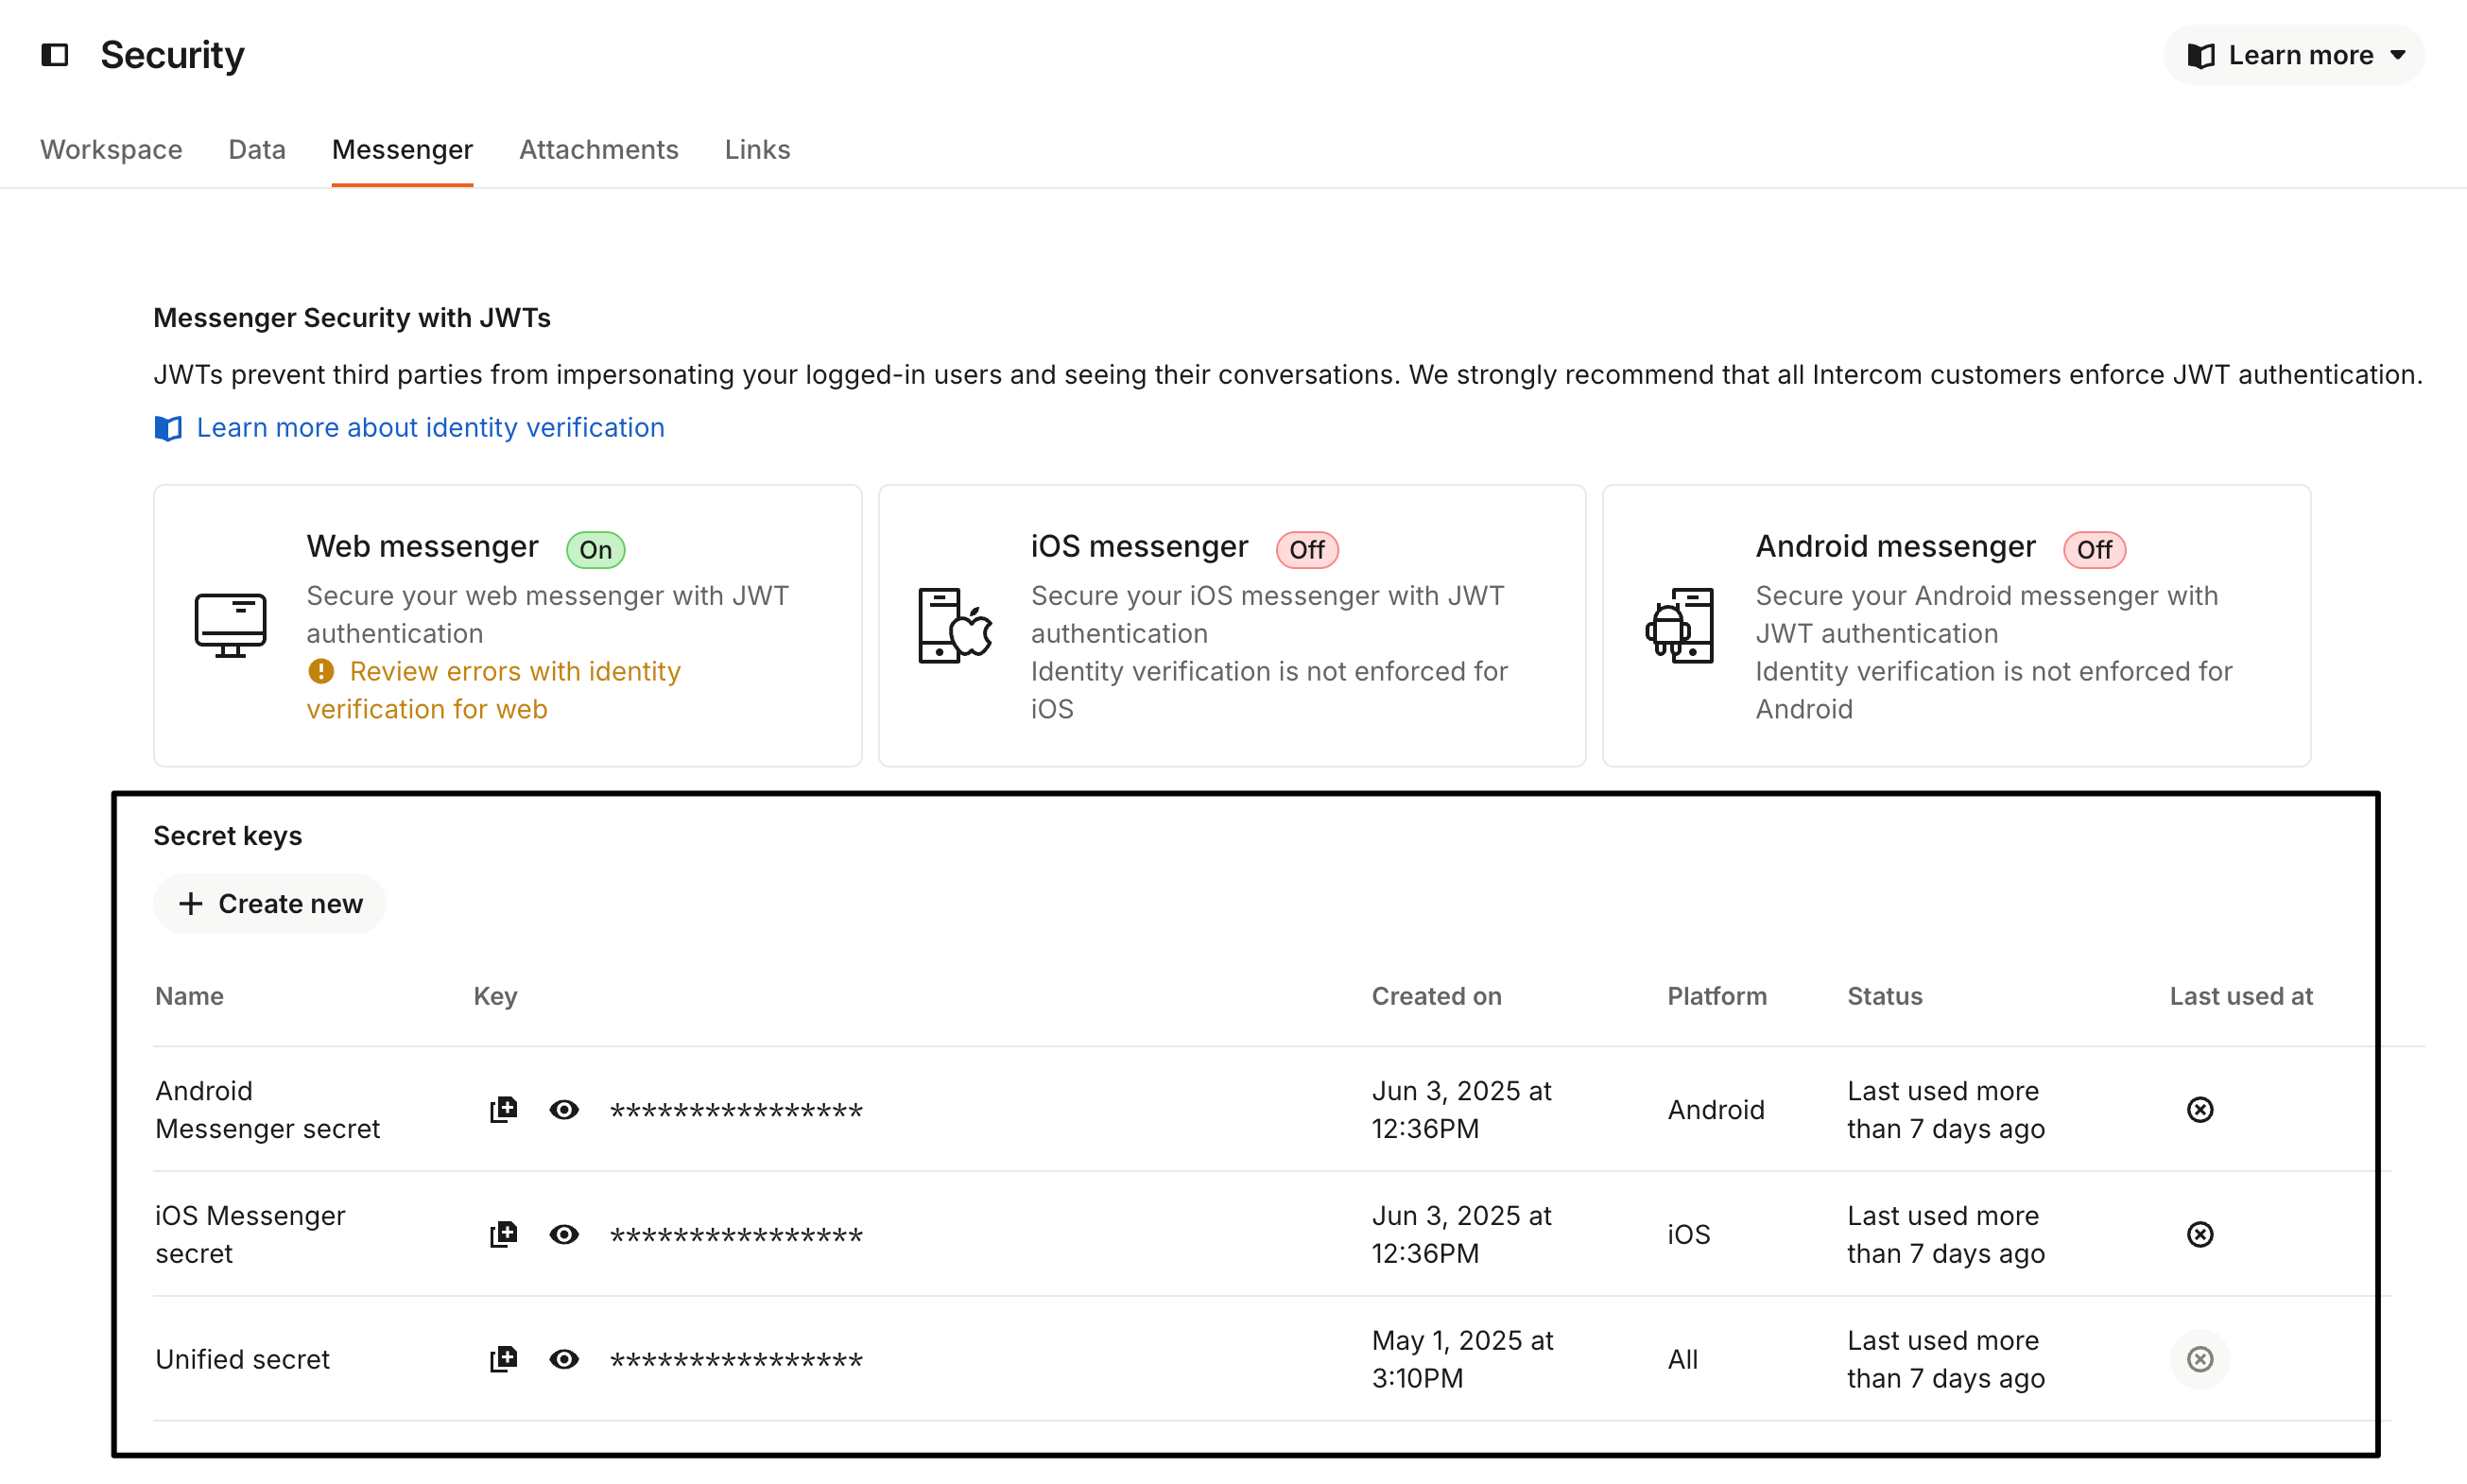
Your secret key can be generated in your workspace's Messenger security settings.
You can find and copy your existing keys on the right hand sidebar of the JWT setup page.
You can rotate keys in Workspace > Security > Messenger.
While JWT is the recommended method, we continue to support Identity Verification with HMAC for backward compatibility. If you're making any changes to your Identity Verification setup, we recommend moving to JWTs.
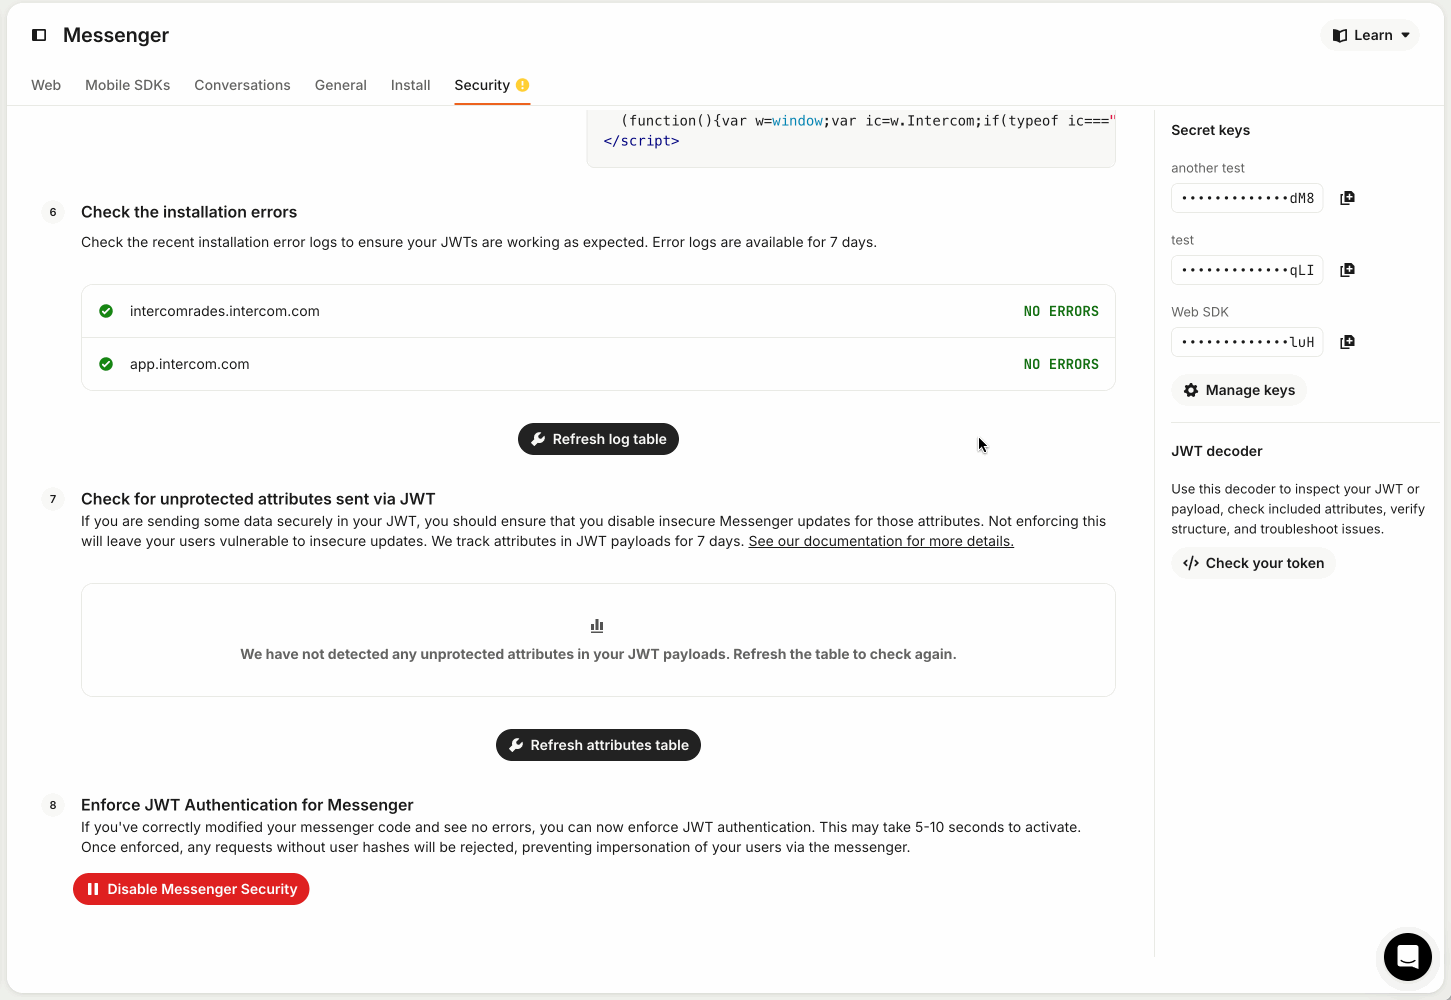
- Having trouble? Check the verbose logs on the setup page and the token debugger
- Check that you’ve set up Messenger security everywhere in your app or website where you talk to logged-in users. If you only set it up on some places and not others, then Intercom Messenger will not work properly.
- Ensure that you secure every integration you have with Intercom. If you only secure web but leave your iOS or Android integrations vulnerable, your data is still at risk.
- Make sure you’re generating your JWT with the right user data based on what you’re sending to Intercom.
- Your JWT must be generated using the user's user_id value.
- Use the right secret key. You can find your secret key in your Messenger security settings).
- Be careful not to leak your secret key onto your frontend client or anywhere publicly accessible. If you’ve leaked your secret key, rotate it in your Messenger security settings.