The Intercom React Native wrapper allows you to use Intercom for iOS and Intercom for Android in your React Native apps.
If you’re new to Intercom, you’ll need to create an account and start your free trial.
- The Intercom React Native wrapper supports version 0.59 of React Native and above.
- Intercom for iOS supports iOS 15 and above.
- Intercom for Android supports API 23 and above.
To install Intercom you'll need to add the wrapper to your React Native project using the following snippet:
yarn add @intercom/intercom-react-nativenpm install @intercom/intercom-react-nativeThere are separate steps for setting up Android and iOS. If your React Native app does not support Android skip to Step 3.
You'll need to take steps to link the wrapper in your project. These vary based on your apps React Native version.
If you're using React Native v0.60 or above, the library will be linked automatically
To automatically link the Intercom React Native wrapper in v0.59 of React Native run the following command:
react-native link @intercom/intercom-react-nativeIf you prefer to manually link libraries, add the following snippet to android/settings.gradle:
include ':intercom-react-native'
project(':intercom-react-native').projectDir = new File(rootProject.projectDir, '../node_modules/@intercom/intercom-react-native/android')
Inside the dependancies block of android/app/build.gradle add the following line:
dependencies {
  implementation project(':intercom-react-native')
}React Native versions below 0.65 use OkHttp 3. The Intercom SDK currently uses OkHttp 4.
There is a problem with compatibility between those two versions which may result in crashes.
If you need to use a React Native version < 0.65, prevent the compatibility issue by adding an explicit dependency on okhttp-urlconnection to dependencies in app/build.gradle:
dependencies {
  implementation("com.squareup.okhttp3:okhttp-urlconnection:4.9.1")
  [...]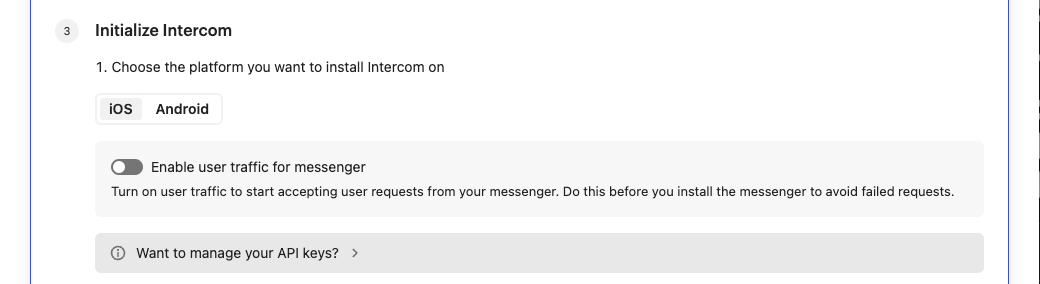
}If you want to initialize Intercom from JavaScript instead of native code, skip this section and jump to Manual Initialization below.
The minSdkVersion in build.gradle needs to be to 23 or greater.
In the dependencies block of the build.gradle make sure that com.android.tools.build:gradle is at version 4.0.1
You'll need to update the MainApplication.java class. First add the import com.intercom.reactnative.IntercomModule at the top of the class.
Then in the onCreate method, add the snippet below using the apiKey and appId found in your workspace settings.
import com.intercom.reactnative.IntercomModule; //  <-- Add this line

// ...

@Override
public void onCreate() {
  super.onCreate();
  SoLoader.init(this, /* native exopackage */ false);

  // ...

  IntercomModule.initialize(this, "apiKey", "appId"); // <-- Add this line

  // ...
}Add below permissions to AndroidManifest.xml
Image Attachments: No additional permissions are required for image attachments on modern Android versions (Android 10+). The SDK uses the system photo picker and scoped storage APIs that don't require storage permissions.
You can also include VIBRATE to enable vibration in push notifications:
<uses-permission android:name="android.permission.VIBRATE"/>If you don't support iOS in your React Native app, you can skip to the configuration step.
If you're using React Native v0.60 or above, the library will be linked automatically after running the pod install command.
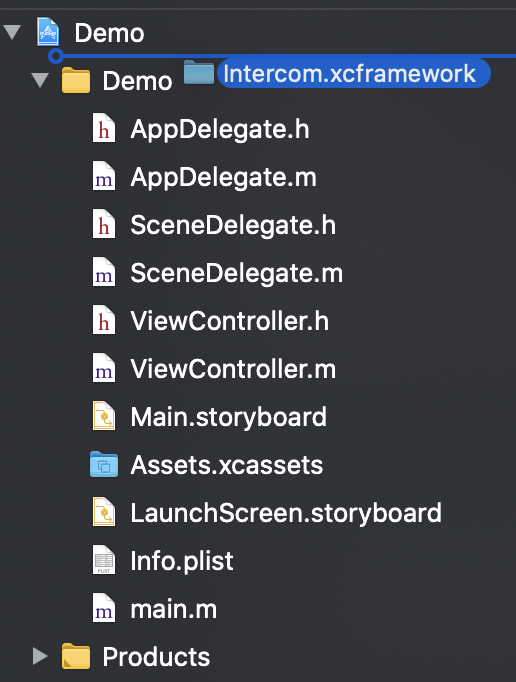
Firstly open your apps .xcworkspace. If you don't have a .workspace file open the .xcodeproj.
Download intercom for iOS and extract the zip
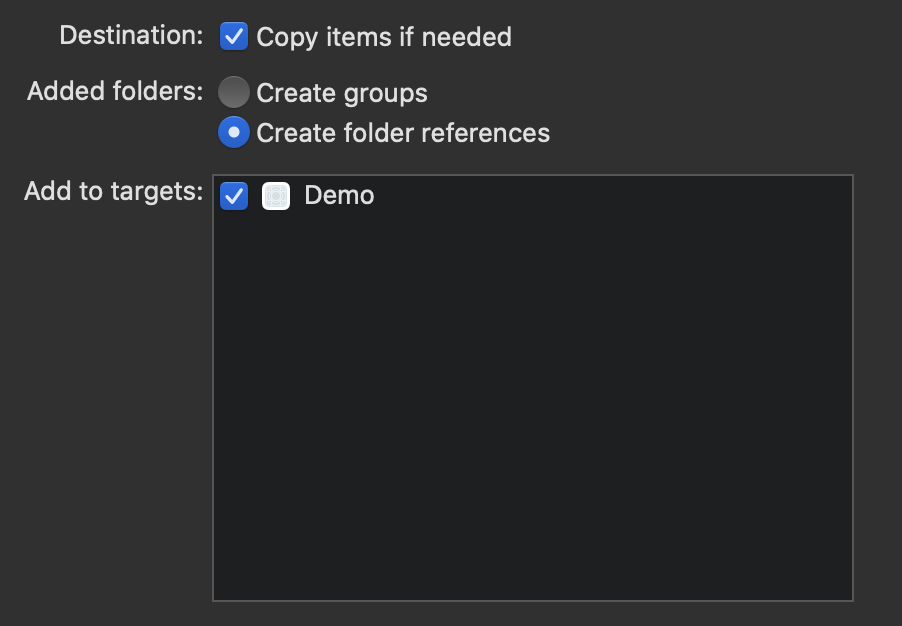
Drag Intercom.xcframework into your project. Make sure "Copy items if needed" is selected and click Finish.
For additional information on iOS manual linking please refer to the React Native developer docs.
If you want to initialize Intercom from JavaScript instead of native code, skip this section and jump to Manual Initialization below.
For Objective-C, open iOS/AppDelegate.m and import <IntercomModule.h>.
For Swift, open iOS/AppDelegate.swift and import intercom_react_native.
#import "AppDelegate.h"
#import <React/RCTBridge.h>
#import <React/RCTBundleURLProvider.h>
#import <React/RCTRootView.h>
// ...
#import <IntercomModule.h> // <-- Add This
Next, in the method didFinishLaunchingWithOptions you'll need to initialize Intercom. Add the snippet below using the apiKey and appId found in your workspace settings.
// ...
  self.window.rootViewController = rootViewController;

  [IntercomModule initialize:@"apiKey" withAppId:@"appId"]; // <-- Add this (Remember to replace strings with your api keys)

  return YES;
}Add these permissions to your Info.plist:
<!-- Optional: Camera access for taking photos in conversations -->
<key>NSCameraUsageDescription</key>
<string>Access your camera to take photos within a conversation</string>

<!-- Optional: Microphone access for voice message transcription (v9.3.0+) -->
<key>NSMicrophoneUsageDescription</key>
<string>Access your microphone to transcribe voice messages in conversations</string>
Note: These permissions are only requested when the user attempts to use the respective feature. You can customize the description strings to match your app's use case.
If you followed the native initialization steps in Step 2 and Step 3 above, you can skip this section and jump to Step 4 - Register your users.
The installation steps above show automatic initialization where Intercom starts when your app launches. However, you can also manually initialize Intercom from JavaScript if you need to delay initialization.
Manual initialization is useful when:
- You want to delay initialization until after user authentication
- You need to prevent in-app messages during onboarding
- You're using dynamic API keys or app IDs based on your app configuration
If you're not using Expo, simply skip the native initialization calls shown in Step 2 and Step 3 above (don't add the IntercomModule.initialize() calls in your native Android/iOS code). Instead, initialize from JavaScript.
Even with manual initialization, you still need to configure platform-specific permissions:
Android: Add the Android Permissions shown in Step 2 (VIBRATE permission for push notifications)
iOS: Add the iOS Permissions shown in Step 3 (NSCameraUsageDescription and optionally NSMicrophoneUsageDescription in Info.plist)
These permissions are required for Intercom features like image/video uploads, regardless of how you initialize the SDK.
import { Platform } from 'react-native';
import Intercom from '@intercom/intercom-react-native';

const apiKey = Platform.select({
  ios: 'ios_sdk-your_ios_api_key',
  android: 'android_sdk-your_android_api_key',
});

await Intercom.initialize(apiKey, 'your_app_id');

await Intercom.loginUserWithUserAttributes({
  email: 'user@example.com',
  userId: 'user-123'
});The initialize() method validates that:
- iOS API keys start with
ios_sdk-and are at least 48 characters long - Android API keys start with
android_sdk-and are at least 52 characters long
Note that this validation only checks the format of your API keys, not whether they're valid credentials. Authentication with Intercom servers happens on first use (e.g., when calling loginUnidentifiedUser() or presenting the Messenger).
// Hide messages before initializing
await Intercom.setInAppMessageVisibility('GONE');

// Initialize Intercom
await Intercom.initialize(apiKey, 'your_app_id');

// After onboarding is complete, show messages
await Intercom.setInAppMessageVisibility('VISIBLE');You’ll need to register your users with Intercom before you can talk to them or see what they do in your app. If a person visits your mobile app they will be a user - the Intercom SDKs do not create leads or visitors. There are three way to register people who visit your app: (1) register only unidentified users (2) register only identified users (3) register both identified and unidentified users. The option you choose should be informed by the design of your app, namely whether you have a login option.
If you have an app with no login option (like Angry Birds or a flashlight app), you should register unidentified users only.
Just register an unidentified user in your application like so:
Intercom.loginUnidentifiedUser();If people must log in to access your app (as with Facebook, Instagram or Slack) you should follow these instructions to register identified users only.
- It is important to only register identified users after verification of a login.
- You can provide a userId and/or email when registering an identified user. We recommend giving all your users unique userIds, but if you haven't implemented this, you should provide an email.
- Don’t use an email address as a userId as this field cannot be changed later. If you choose provide only an email address, the email address must not be associated with any other users on your workspace.
Intercom.loginUserWithUserAttributes({
  email: "bob@example.com",
  userId: "bob-123",
});If you have an app with both unidentified and identified users (like Google Maps or YouTube), you will need to either conditionally choose which registration to call:
if (loggedIn) {
  Intercom.loginUserWithUserAttributes({
    email: "bob@example.com",
    userId: "bob-123",
  });
} else {
  Intercom.loginUnidentifiedUser();
}
Or you can register with Intercom.loginUnidentifiedUser() and if a user signs up/logs in later in your app call Intercom.loginUserWithUserAttributes. We will automatically transfer over any attributes or conversations from the unidentified user to the identified user, so you won't lose anything.
You should only unregister an identified user. Unregistering an unidentified user will result in orphan records that cannot be merged in future.
When users want to log out of your app, simply call:
Intercom.logout();Intercom knows when your app is backgrounded and comes alive again, so you won't need to re-register your users.
If you are using Expo, you can use the built-in plugin. After installing the intercom-react-native package, add the config plugin to the plugins array of your app.json or app.config.js:
{
  "expo": {
    "plugins": ["@intercom/intercom-react-native"]
  }
}
The plugin provides props for extra customization. Every time you change the props or plugins, you'll need to rebuild (and prebuild) the native app. If no extra properties are added, defaults will be used.
intercomRegion(string): Region for IntercomUS,EU,AU. Optional. Defaults toUS.useManualInit(boolean): Set totrueto manually initialize Intercom from JavaScript instead of at app startup. Optional. Defaults tofalse.
When useManualInit is false (automatic initialization), the following properties are required:
appId(string): App ID from Intercom.androidApiKey(string): Android API Key from Intercom.iosApiKey(string): iOS API Key from Intercom.
When useManualInit is true (manual initialization), these properties are not required as you'll provide them when calling Intercom.initialize() from your JavaScript code.
{
  "expo": {
    "plugins": [
      [
        "@intercom/intercom-react-native",
        {
          "appId": "abc123",
          "androidApiKey": "android_sdk-abc123",
          "iosApiKey": "ios_sdk-abc123",
          "intercomRegion": "EU" // Europe
        }
      ]
    ]
  }
}
Next, rebuild your app as described in the "Adding custom native code" guide.
To enable camera and microphone features in your Expo app, add the following to your app.json or app.config.js:
{
  "expo": {
    "ios": {
      "infoPlist": {
        "NSCameraUsageDescription": "Access your camera to take photos within a conversation",
        "NSMicrophoneUsageDescription": "Access your microphone to transcribe voice messages in conversations"
      }
    }
  }
}
Note: These permissions are required for v9.3.0+. The microphone permission enables voice message transcription. You can customize the description strings to match your app's use case.
After adding these permissions, run npx expo prebuild to regenerate the native iOS project with the updated Info.plist.
For Expo apps, use the useManualInit option in your plugin configuration to delay initialization:
{
  "expo": {
    "plugins": [
      [
        "@intercom/intercom-react-native",
        {
          "intercomRegion": "EU", // Optional, defaults to "US"
          "useManualInit": true
        }
      ]
    ]
  }
}
When useManualInit is true, you don't need to provide appId, androidApiKey, or iosApiKey in the plugin configuration. The Expo plugin will still handle platform permissions automatically.
Then initialize Intercom manually in your JavaScript code using Platform.select for platform-specific API keys:
import { Platform } from 'react-native';
import Intercom from '@intercom/intercom-react-native';

const apiKey = Platform.select({
  ios: 'ios_sdk-your_ios_api_key',
  android: 'android_sdk-your_android_api_key',
});

await Intercom.initialize(apiKey, 'your_app_id');

await Intercom.loginUserWithUserAttributes({
  email: 'user@example.com',
  userId: 'user-123'
});
You can also control message visibility around initialization:
// Hide messages before initializing
await Intercom.setInAppMessageVisibility('GONE');

// Initialize Intercom
await Intercom.initialize(apiKey, 'your_app_id');

// After onboarding is complete, show messages
await Intercom.setInAppMessageVisibility('VISIBLE');The initialize() method validates that:
- iOS API keys start with
ios_sdk-and are at least 48 characters long - Android API keys start with
android_sdk-and are at least 52 characters long
Note that this validation only checks the format of your API keys, not whether they're valid credentials. Authentication with Intercom servers happens on first use (e.g., when calling loginUnidentifiedUser() or presenting the Messenger).
This is particularly useful for:
- Preventing in-app messages from appearing during onboarding
- Waiting for user authentication before initializing
- Using dynamic API keys or app IDs based on your app configuration
- Configure your React Native app for Intercom and create customizations.
- Enable push notifications so you can send push messages.
- Enable Identity Verification for your React Native app.
- If Data Hosting in Europe, modify your app's region configuration