Track who your users are and what they do in your mobile app and customize the Intercom Messenger. Here’s how to configure Intercom for Android:
You’ll now need to login your users before you can talk to them and track their activity in your app.
There are two type of users that can be created in Intercom: identified and unidentified.
- Identified users: If users need to login to your app to use it, such as Facebook, Instagram, or Slack, they would be considered identified users.
- Unidentified users: If your app does not have a login option, like Angry Birds or a flashlight app, you have unidentified users.
There are three ways to log users into Intercom that visit your app:
- Only login identified users
- Only login unidentified users
- Login both identified and unidentified users - an example of this is where your app has a login option, but it’s not essential for users to login to use your app, like Google Maps or YouTube.
The option you choose should be informed by the design of your app, namely whether you have a login option.
- First you'll have to create an user
val registration = Registration.create().withUserId("123456")- Then can login your user, like this:
private fun successfulLogin() {
        /* For best results, use a unique user_id if you have one. */
        val registration = Registration.create().withUserId("123456")
        Intercom.client().loginIdentifiedUser(
            userRegistration = registration,
            intercomStatusCallback = object : IntercomStatusCallback{
                override fun onSuccess() {
                    // Handle success
                }

                override fun onFailure(intercomError: IntercomError) {
                    // Handle failure
                }

            }
        )
}If you don't have a unique userId to use here, or if you have a userId and an email, you can use with Email(String email) on the Registration object.
- You’ll also need to register your user anywhere they sign in. Just call:
if (loggedIn) {
/* We're logged in, we can register the user with Intercom */
    val registration = Registration.create().withUserId("123456")
    Intercom.client().loginIdentifiedUser(
            userRegistration = registration,
            intercomStatusCallback = object : IntercomStatusCallback{
                override fun onSuccess() {
                    // Handle success
                }

                override fun onFailure(intercomError: IntercomError) {
                    // Handle failure
                }

            }
        )
}Follow these instructions to login your unidentified users:
override fun onCreate() {
    super.onCreate()
    Intercom.initialize(this, "your api key", "your app id")
    Intercom.client().loginUnidentifiedUser(
            intercomStatusCallback = object : IntercomStatusCallback{
                override fun onSuccess() {
                    // Handle success
                }

                override fun onFailure(intercomError: IntercomError) {
                    // Handle failure
                }

            }
        )
}- First, you’ll need to login your user, like this:
private fun successfulLogin() {
    /* For best results, use a unique user_id if you have one. */
    val registration = Registration.create().withUserId("123456")
    Intercom.client().loginIdentifiedUser(registration, new IntercomStatusCallback() {
                @Override
                public void onSuccess() {
                    // Handle success
                }

                @Override
                public void onFailure(@NonNull IntercomError intercomError) {
                    // Handle failure
                }
            });
}If you don't have a unique userId to use here, or if you have a userId and an email, you can use with withEmail(String email) on the Registration object.
- You’ll also need to login your user anywhere they sign in. Just call:
if (loggedIn) {
    /* We're logged in, we can login the user with Intercom */
    val registration = Registration.create().withUserId("123456")
    Intercom.client().loginIdentifiedUser(registration, new IntercomStatusCallback() {
                @Override
                public void onSuccess() {
                    // Handle success
                }

                @Override
                public void onFailure(@NonNull IntercomError intercomError) {
                    // Handle failure
                }
            });
} else {
    /* Since we aren't logged in, we are an unidentified user.
     * Let's tell Intercom. */
    Intercom.client().loginUnidentifiedUser(new IntercomStatusCallback() {
            @Override
            public void onSuccess() {
                // Handle success
            }

            @Override
            public void onFailure(@NonNull IntercomError intercomError) {
                // Handle failure
            }
        });
}When users want to log out of your app, simply call logout like so:
private fun logout() {
    /* This clears the Intercom SDK's cache of your user's identity
     * and wipes the slate clean. */
    Intercom.client().logout()
}- Don’t use an email address as a userId as this field is unique and cannot be changed or updated later. If you only have an email address, you can just register a user with that.
- If you login users with an email address, the email must be a unique field in your app. Otherwise we won't know which user to update and the mobile integration won't work.
Intercom knows when your app is backgrounded and comes alive again, so you won’t need to re-register your users.
updateUser(
        userAttributes: UserAttributes,
        intercomStatusCallback: IntercomStatusCallback
)- userAttributes : The userAttributes object with the attributes to be set on the user in Intercom.
- intercomStatusCallback : IntercomStatusCallback to listen to success and failure
You can send any data you like to Intercom from standard user attributes that are common to all Intercom users to custom user attributes that are unique to your app.
The complete list of standard user attributes that can be updated are described in the UserAttributes object. Standard user attributes such as a user's name or email address can be updated by calling:
val userAttributes = UserAttributes.Builder()
        .withName("Bob")
        .withEmail("bob@example.com")
        .build()
Intercom.client().updateUser(
            userAttributes = userAttributes,
            intercomStatusCallback = object : IntercomStatusCallback {
                override fun onSuccess() {
                    // Handle success
                }

                override fun onFailure(intercomError: IntercomError) {
                    // Handle failure
                }
            }
        )
Typically our customers see a lot of value in sending custom data that relates to customer development, such as price plan, value of purchases, etc. Custom user attributes must first be created in Intercom using one of the methods described here. They can then be modified by calling withCustomAttribute(key, value) on the UserAttributes object.
val userAttributes = UserAttributes.Builder()
        .withCustomAttribute("paid_subscriber", "Yes")
        .withCustomAttribute("monthly_spend", 155.5)
        .withCustomAttribute("team_mates", 3)
        .build()
Intercom.client().updateUser(
            userAttributes = userAttributes,
            intercomStatusCallback = object : IntercomStatusCallback {
                override fun onSuccess() {
                    // Handle success
                }

                override fun onFailure(intercomError: IntercomError) {
                    // Handle failure
                }
            }
)Custom attributes must be created in Intercom using one of the methods described here before they can be updated.
You can also set company data on your user with the Company object, like:
val company = Company.Builder()
        .withName("My Company")
        .withCompanyId("abc1234")
        .build()
val userAttributes = UserAttributes.Builder()
        .withCompany(company)
        .build()
Intercom.client().updateUser(
            userAttributes = userAttributes,
            intercomStatusCallback = object : IntercomStatusCallback {
                override fun onSuccess() {
                    // Handle success
                }

                override fun onFailure(intercomError: IntercomError) {
                    // Handle failure
                }
            }
)id is a required field for adding or modifying a company. The Company object describes all the standard attributes you can modify.
logEvent(name: String?, metaData: Map<String, *>?)name: The name of the event you wish to track.metaData: a map of simple types to present to Intercom
You can log events in Intercom that record what users do in your app and when they do it. For example, you could record the item a user ordered from your mobile app, and when they ordered it.
val eventData = mapOf(
    "order_date" to "1392036272",
    "stripe_invoice" to "38572984"
)
Intercom.client().logEvent("sent_invitation", eventData)
You’ll find more details about how events work and how to submit them here.
present(space: IntercomSpace)space: The IntercomSpace enum for the space to be presented
Spaces are different areas of the messenger that you can open directly. Intercom defines 4 possible spaces:
- Home
- Help Center
- Messages
- Tickets
These spaces can be presented by:
Intercom.client().present(space = IntercomSpace.Home)This opens Intercom and displays Home space.
Similarly, you can present HelpCenter and Messages by passing the respective enum.
Not providing space and calling Intercom.client().present() will open Home by default
presentContent(content: IntercomContent)content: The IntercomContent to be presented
There are various IntercomContent that you can present. The available types are:
- Article
- Survey
- Carousel
- Help Center Collections
- Conversations
To present an Intercom content you create the respective IntercomContent object and then call presentContent with that object
For example, you can present an Article as follows
Intercom.client().presentContent(content = IntercomContent.Article(id = "12345"))Similarly, you can can present Surveys, Carousels and Help Center Collections.
A piece of content must be ‘live’ to be used in this feature. If it is in a draft or paused state, end-users will see an error if the app tries to open the content.
You may also present conversations using their IDs.
Intercom.client().presentContent(content = IntercomContent.Conversation(id = "12345"))We definitely recommend that you customize the Intercom Messenger so that it feels completely at home on your product, site or mobile app. Here’s how:
- Select the color and language of the Messenger and how personalize your profiles.
- Follow the below steps to choose how the launcher appears and opens for your users.
If you’d like the standard launcher to appear on the bottom right-hand side of your screen, just call:
Intercom.client().setLauncherVisibility(Visibility.VISIBLE)If you want to set the bottom padding for the Messenger, which dictates how far from the bottom of the screen the default launcher and in-app messages will appear, you can call:
Intercom.client().setBottomPadding(bottomPadding)However, if you’d like the Messenger to open from another location in your mobile app, you can create a custom launcher. This allows you to specify a button, link or element that opens the Messenger. For example, you can trigger the launcher to open when a customer clicks on your ‘Help and Support’ button.
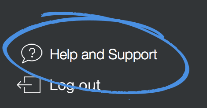
If you have a custom launcher, you can call:
Intercom.client().present()If you want to open the Messenger to the composer screen with message field pre-populated you can call:
Intercom.client().displayMessageComposer("Message")Now you can show how many unread conversations your user has on your custom launcher. Even if a user dismisses a notification, they’ll still have a persistent indicator of unread conversations.
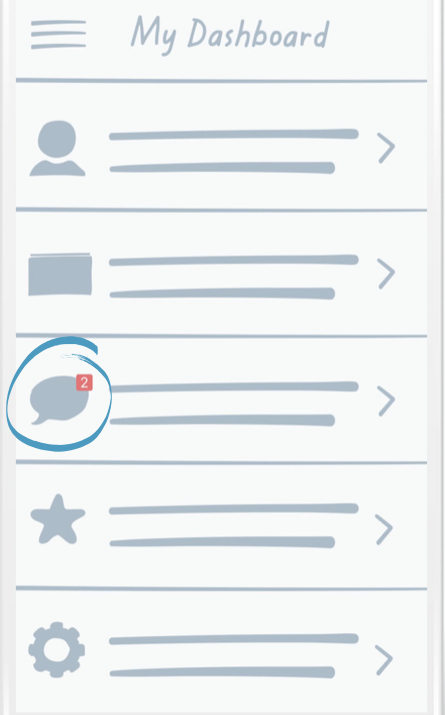
Just grab the current count with this method:
Intercom.client().getUnreadConversationCount()Then, start listening for updates using:
Intercom.client().addUnreadConversationCountListener(listener)listener: AnUnreadConversationCountListenerthat will be called when the unread count changes
You can implement the UnreadConversationCountListener interface to receive updates:
val listener = object : UnreadConversationCountListener {
    override fun onCountChanged(unreadCount: Int) {
        // Update your UI with the new unread count
        updateBadgeCount(unreadCount)
    }
}
Intercom.client().addUnreadConversationCountListener(listener)
Don't forget to remove the listener when you no longer need it:
Intercom.client().removeUnreadConversationCountListener(listener)setThemeMode(themeMode: ThemeMode?)themeMode: The theme mode to set (LIGHT, DARK, SYSTEM, or null to use server-provided theme)
You can override the server-provided theme setting for the current session only. The theme mode controls whether the SDK displays in light mode, dark mode, or follows the system theme. The theme selection will be reset when the app restarts.
// Enable dark mode
Intercom.client().setThemeMode(ThemeMode.DARK)

// Enable light mode
Intercom.client().setThemeMode(ThemeMode.LIGHT)

// Use system preference
Intercom.client().setThemeMode(ThemeMode.SYSTEM)

// Clear override and use server-provided theme
Intercom.client().setThemeMode(null)This method was introduced in version 17.0.0 of the Android SDK.
changeWorkspace(apiKey: String?, appId: String?)apiKey: The Android SDK API key found on the Intercom for Android settings page.appId: The app ID of your Intercom app.
Use this to change the workspace that the SDK is connected to. This will also logout the current user and clear all data from Intercom SDK. Once called, the SDK will no longer communicate with Intercom until a further registration is made.
Intercom.client().changeWorkspace("your_new_api_key", "your_new_app_id")This method was introduced in version 16.1.0 of the Android SDK.
This method will automatically logout the current user and clear all SDK data. You will need to register a user again after changing workspaces.
You can prevent in app messages from popping up in certain parts of your app by calling:
Intercom.client().setInAppMessageVisibility(Visibility.GONE)📘 Mobile Carousels and Surveys Visibility
The method setInAppMessageVisibility does not apply to Mobile Carousels or Surveys. They will always be displayed.
You can hide any Intercom screen in your app, by calling:
Intercom.client().hideIntercom()Now that you have Intercom configured you can: